
Infrared camera on an interactiveSQUASH system is a part of the ball detection mechanism that is responsible for detecting the vertical component of a ball hit. As such, if your camera is not properly calibrated it will look like your ball hits appear too high or too low from the actual hit position. In this case you should perform infrared camera calibration from Courtadmin.
Step 1: Calibration menu
You can find infrared camera calibration menu in Systems (Choose your system) -> Settings -> Infrared camera
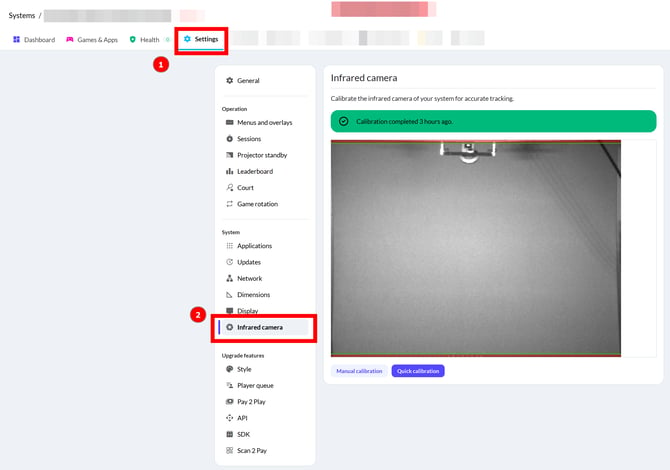
You have two options for calibration:
- Quick calibration - is done completely automatically within seconds. It's recommended to choose this option if your camera has already been properly setup in the past (direction/centering, focus, etc.)
- Manual calibration - walks you through a two-step process where you would select correct corners and outlines. Provides more precision and control
Step 2: Calibration
2.1: Quick calibration
If you opted for quick calibration, all you need to do is press the "Quick calibration" button. System will automatically go through all steps in a couple of seconds. At the end you will be presented with a confidence score of the algorithm. It provides a rough estimate of how well the algorithm calibrated the camera. You will also see the final calibrated baseline image. Read more about it in Step 3 below.
2.2: Manual Calibration
If you opted for manual calibration, press "Manual calibration" button. After a couple of seconds you will be presented with an image of your wall with 4 points that can be freely moved.
Before moving forward, you need to make sure that your camera has correct physical setup: the front wall must be in the middle of the image and should not be too blurry. In case image is not suitable, you will need to physically align the camera such that it looks right in the center of the wall and adjust focus by turning one the rings on the camera lens. To confirm correct physical setup, you can retake a new image by pressing "Retake" button and adjusting exposure. The default exposure of 40000 should be ideal value. If your image appears too bright, you may lower the exposure. If it appears too dark, you may increase it.
Below are common physical setup problems that should be resolved before moving forward:
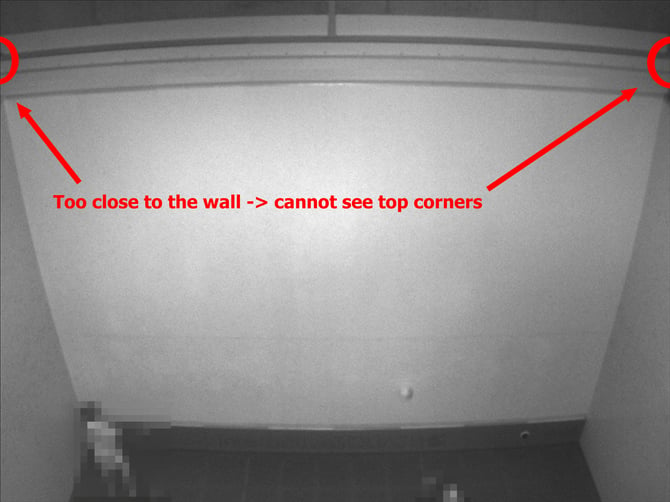
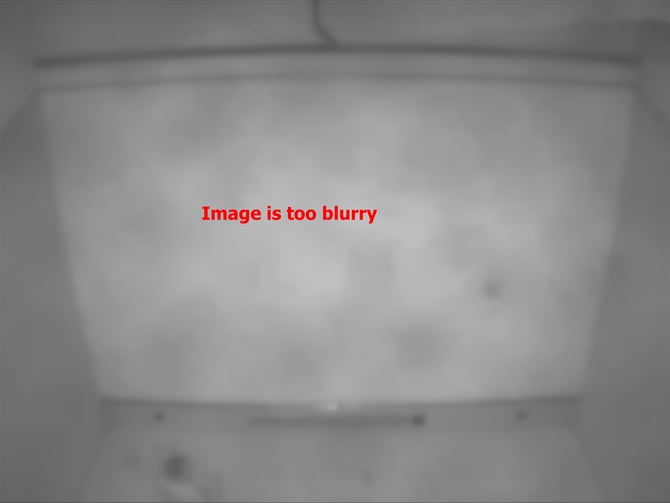
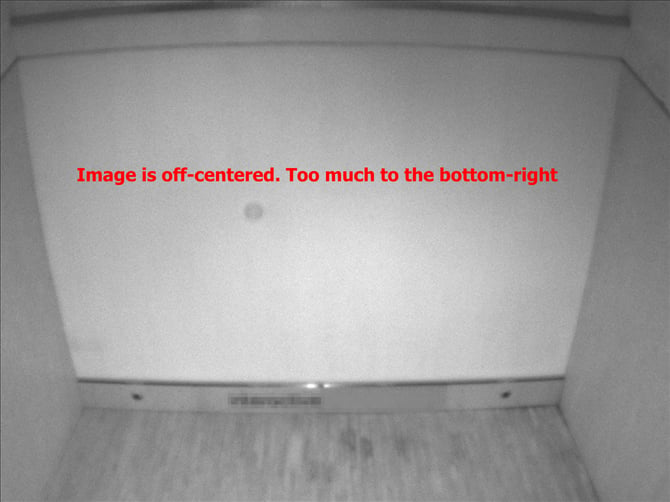
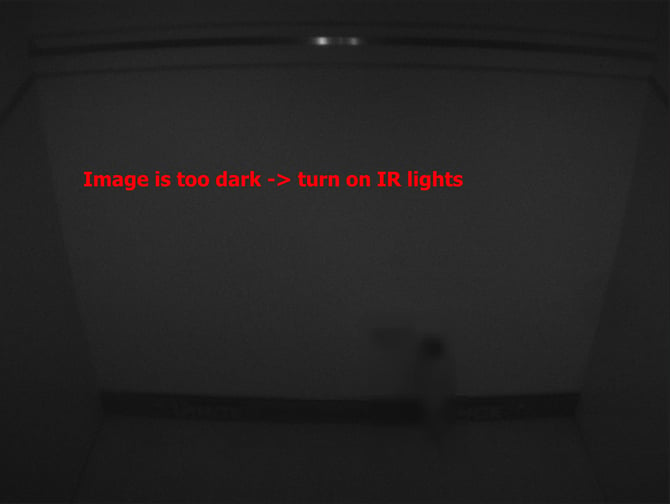
If your image stays too dark even after increasing exposure, make sure your system's infrared lights are turned on. You can tell it by looking at the front of the projector box and seeing rows of red dots. If infrared lights are turned off, try launching/restarting Menu game.
Once you have a good image of your wall, you will need to put those 4 points at the correct positions such that they properly cover the wall. More specifically:
-
Top-left point - needs to be on the intersection of the front and left walls, under the top metal tin:
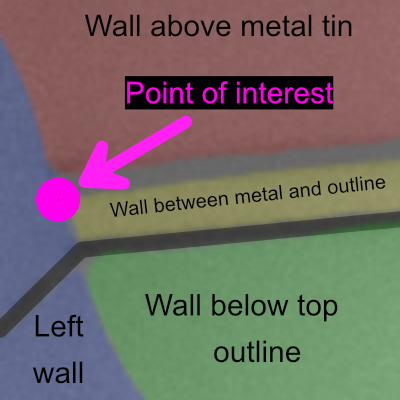 - Top-left point
-
Top-right point - needs to be on the intersection of the front and right walls, under the top metal tin (symmetrically to the Top-left)
-
Bottom-right point - needs to be on the intersection of the front and right walls, above the bottom metal tin:
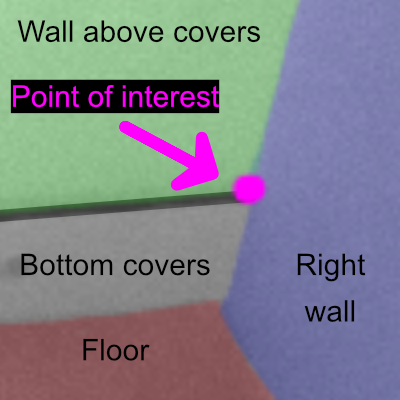 - Bottom-right point
-
Bottom-left point - needs to be on the intersection of the front and left walls, above the bottom metal tin (symmetrically to the Bottom-right)
In the end you should have a picture like this:
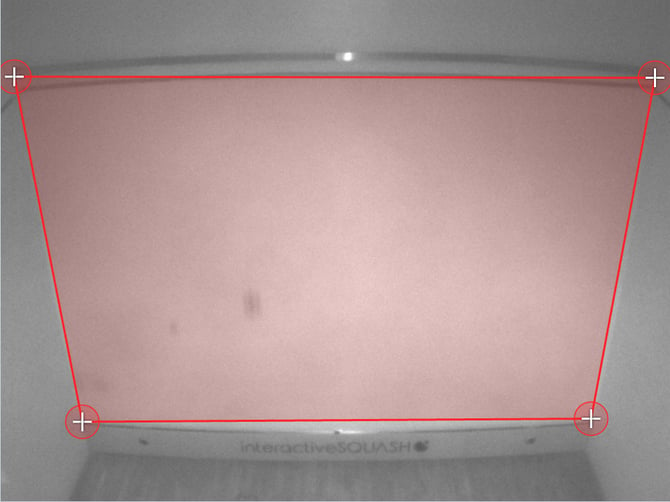
If your physical setup is very good, it is possible that the algorithm will put points at the correct positions from the very start. In this case, you don't need to adjust them further
Proceed by clicking "Confirm" button.
After a couple of seconds you will be presented with a new image of the wall. This is the Baseline image that will be used for ball detection. Drawn on it, you will have two adjustable horizontal lines:
- One of them marked "out-line" should be placed over the top out line
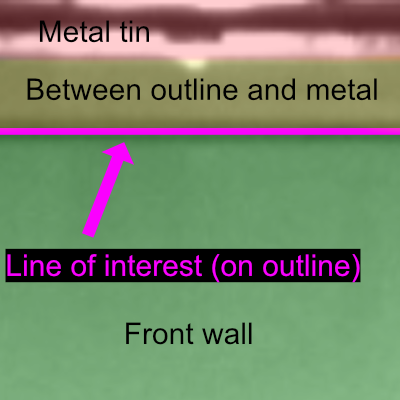
- The other marked "tin" should be placed right above the bottom tin
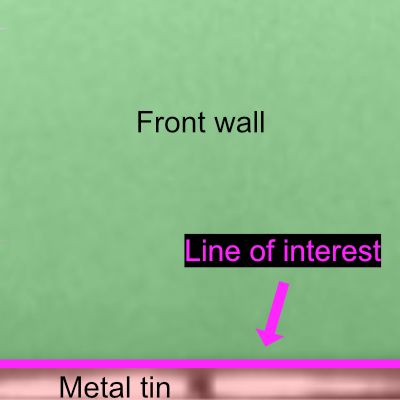
Similarly, if your physical setup is very good, it is possible that the algorithm will put lines at the correct positions from the very start. In this case, you don't need to adjust them further
Proceed by clicking "Confirm" button.
After a couple of seconds the calibration will conclude and you will be presented with the final Baseline image for reference.
Step 3: Checking the Baseline image
At the end of the calibration process you will be presented with the final Baseline image. To make sure that calibration has concluded successfully you should check this image for potential issues.
A good Baseline image should look something like this:
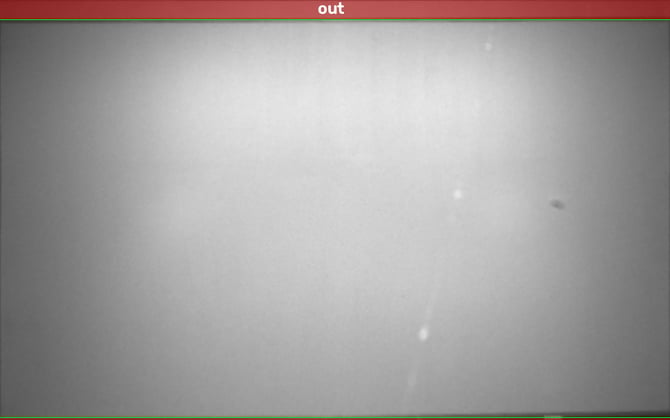
You will see two green lines drawn on the image:
- Top line is drawn over the physical top out line and defines an "out" zone above it
- Bottom line is drawn above the bottom metal tin and defines an "out' zone below it
Any ball that hits an "out" zone will be processed as an "out", so system will not react on it even though it could detect it. Please make sure your "out" zones are correctly defined.
In majority of successful calibrations, the bottom metal should be only barely visible. This means the Bottom line should appear very close to the bottom edge of the image.
If you didn't get a good Baseline image or your ball hits still appear too high or too low after calibration, please try to repeat the calibration steps more carefully.