
In order to finish the installation, our Service Team has to reconfigure your system remotely. Therefore, please contact the Service Team before the installation so that we align and avoid any downtime.
Removal of the original computer
- Turn off the System
-
Remove the cover of the system by removing the four TX30 screws on the bottom of the console
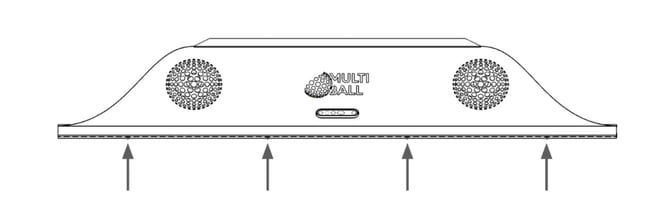
- Tilt the console cover and lift it up to release it from the hinge slot
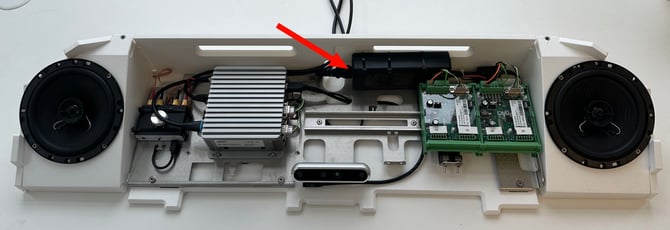
- Unplug the connector from the power supply
-
Locate the original computer, it is on the left inside the console
-
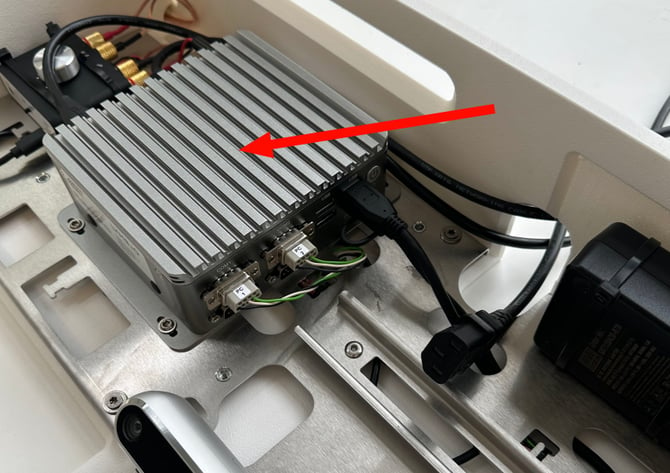
Unplug all cables on all sides from the computer
-
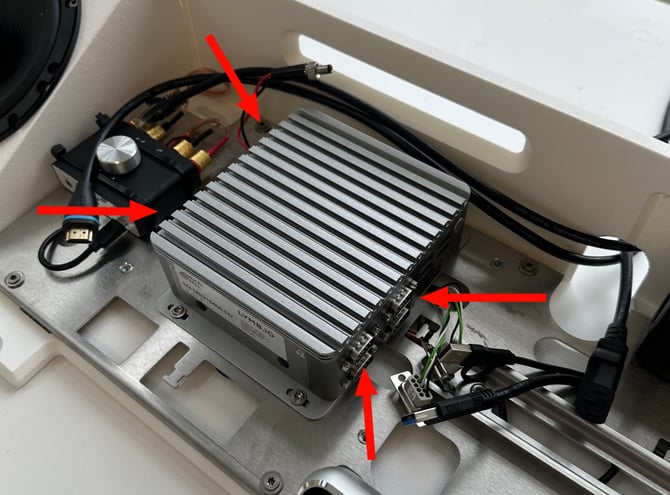
Remove the Computer from the metal plate by removing the four screws
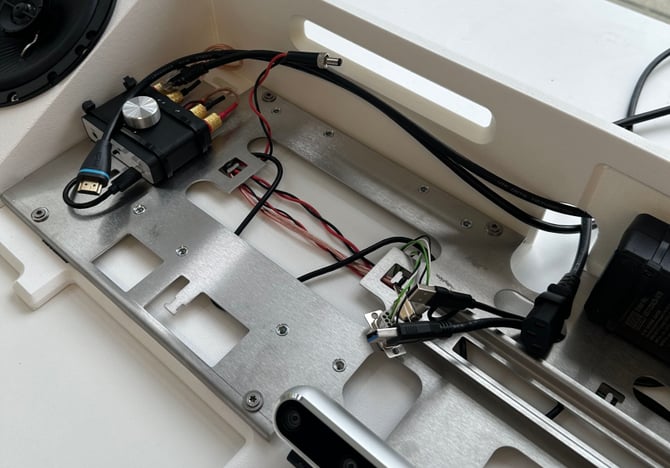
Cable Rearrangement
- Unplug the left side of the amplifier output. This step isn't always needed, but it makes the next steps easier.
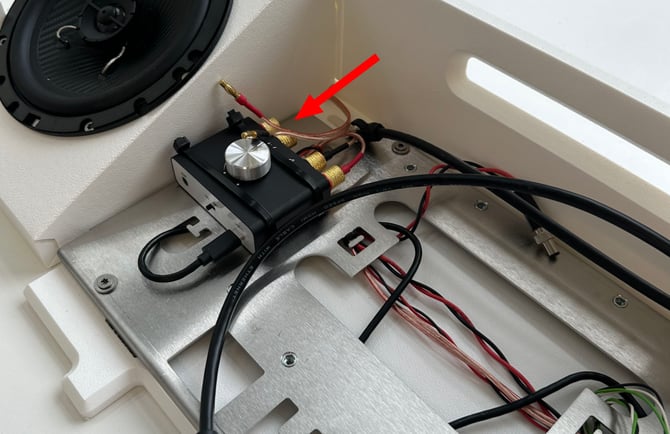
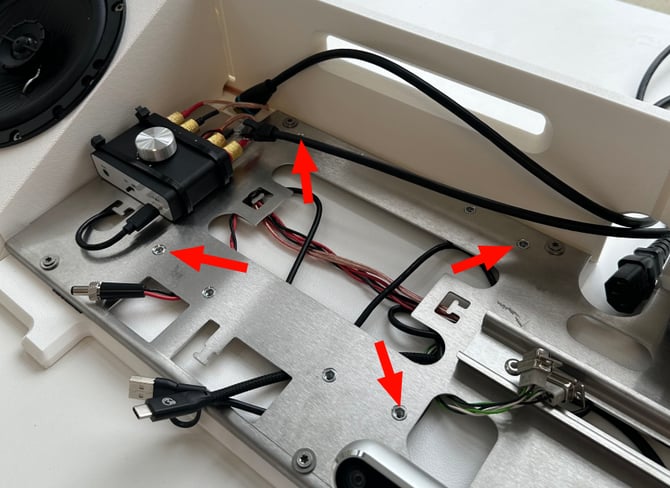
- Remove the four screws on the left side of the metal plate
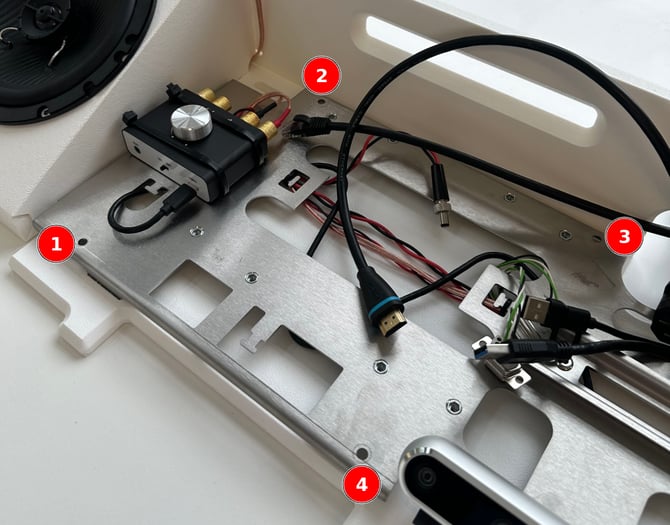
- You can now slightly lift the metal plate so that you can access the cables
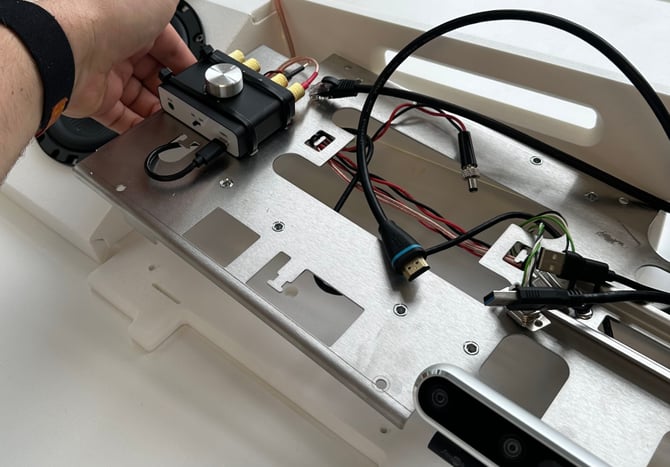
- Unplug the USB cable from the tracking camera and completely remove the whole cable
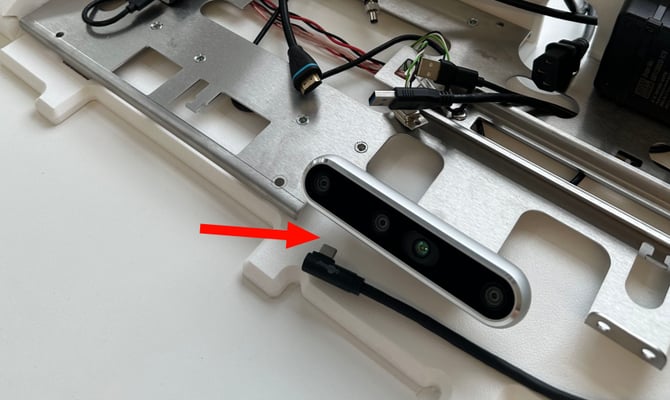
- Plug in the new short USB-C cable into the realsense camera
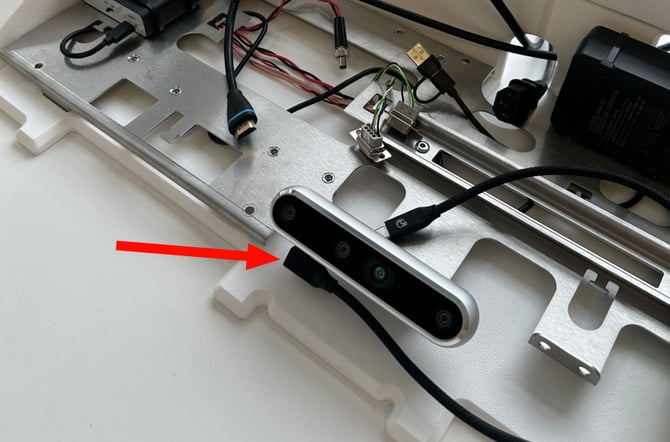
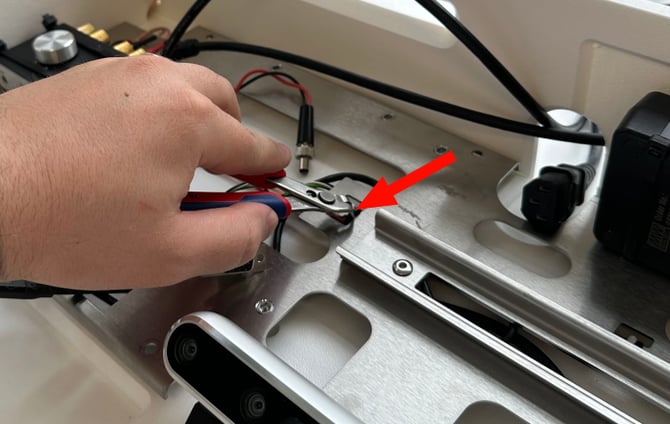
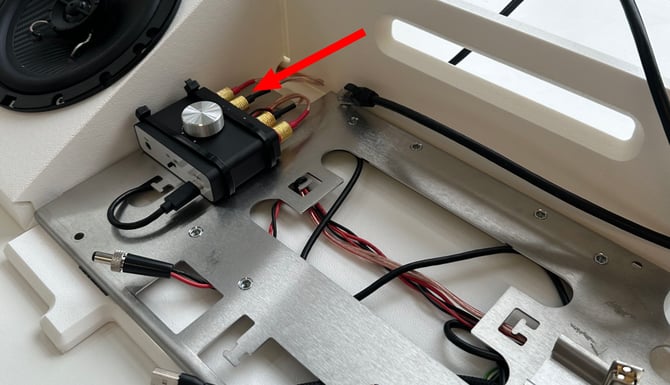
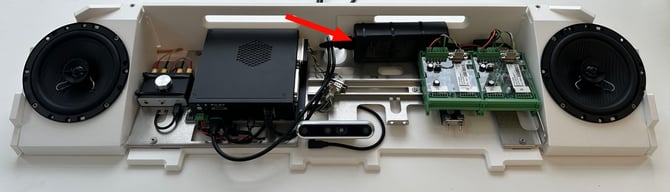
- Remove the cable tie shown in the picture
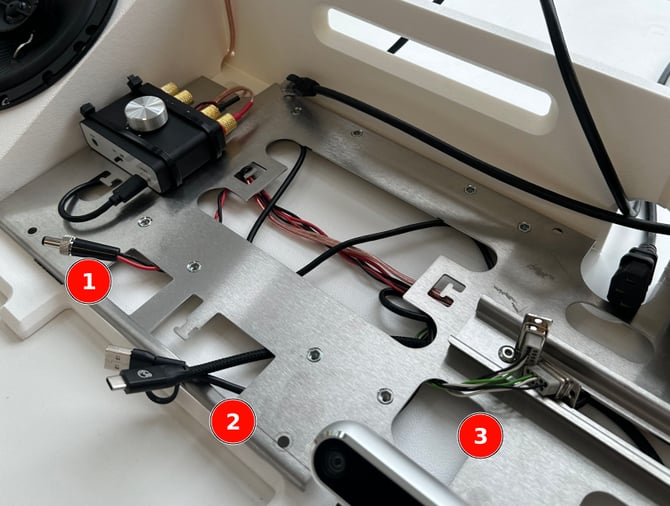
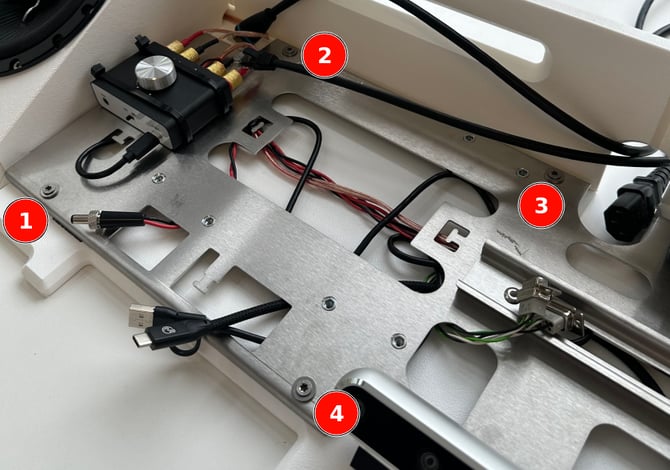
- Bring all the cables into their new positions. 1 - Power Cable, 2 - USB Cables, 3 - Serial Cables
- Plug the amplifier back in
- Reinstall the screws in the metal plate
Computer Installation
-
Check if your metal plate already has the threads for the new computer
Option A - Yes, there are threads ✅
- If your metal plate does have the threads, you can directly install the new computer using the four old computer screws
Option B - No, there are no threads ❌
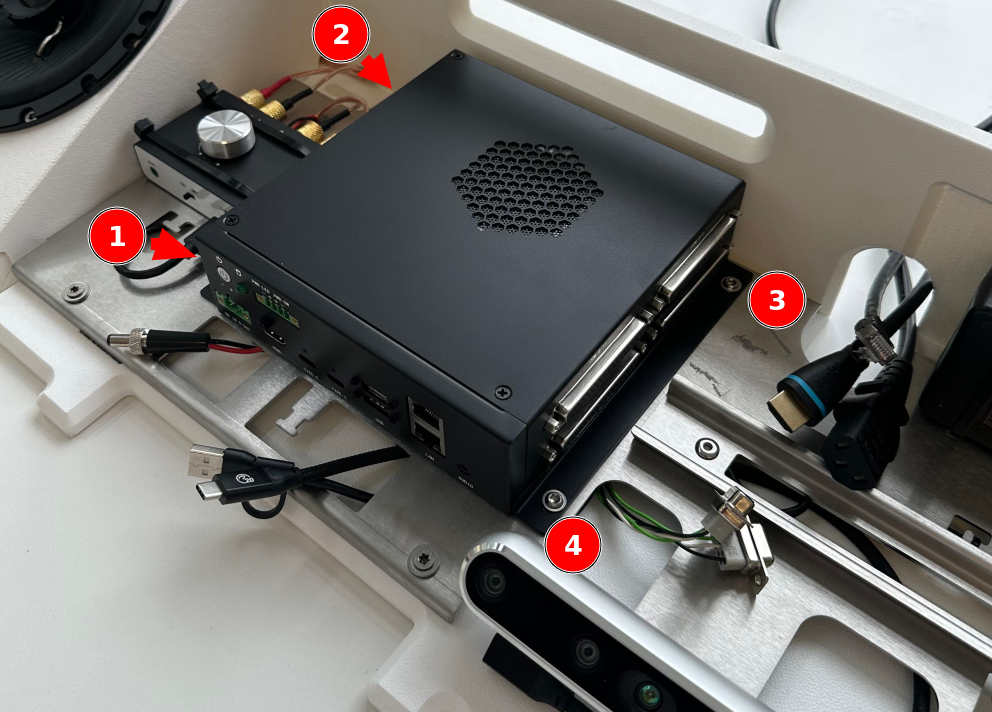
- If your metal plate does not have threads, you have to install the adapter plate. Screw it to the metal plate using the four screws that come with the adapter plate
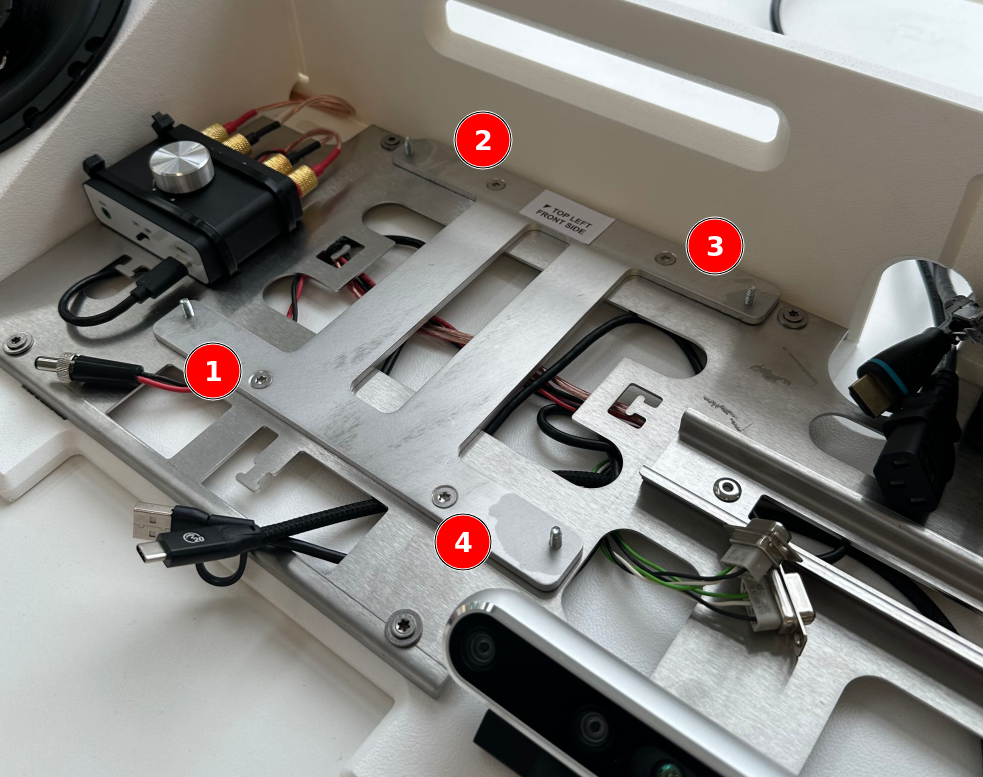
- Place the computer on top of the adapter plate and secure it with the four nuts
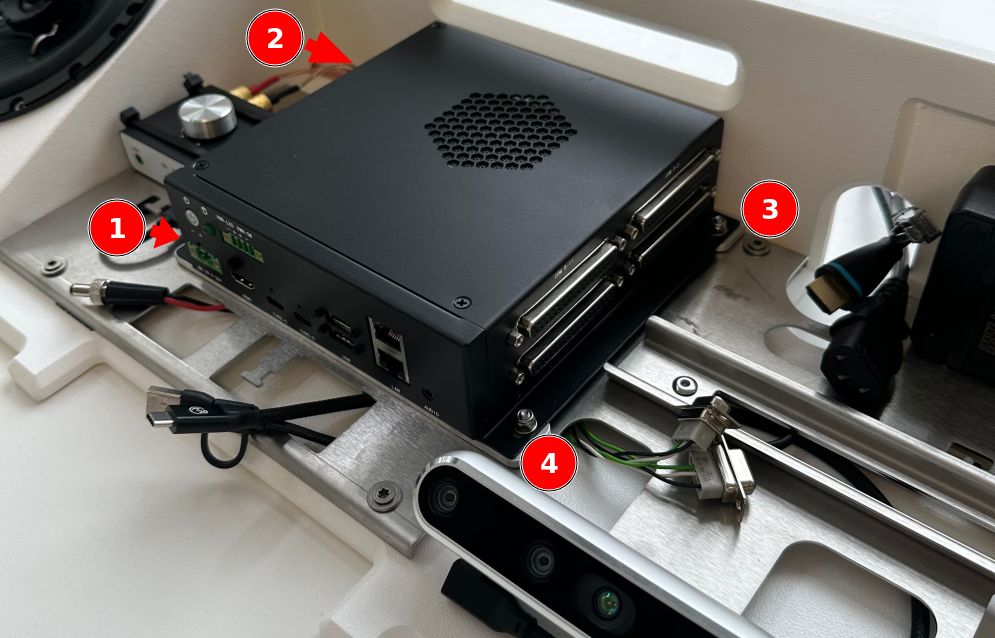
Cabling
- Install the power cable adapter by screwing it onto the original cable
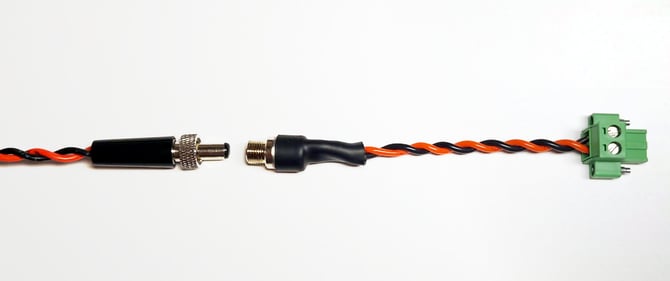
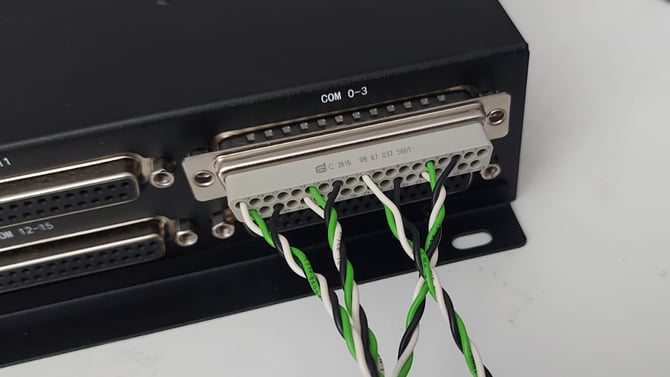
- Plug in the serial adapter into the new computer at position COM 0-3. If possible, secure the connector with screws.
- Plug in the power adapter cable (1), the HDMI cable (2), the USB cables for the tracking camera (3) and the amplifier (4), as well as your LAN cable (4).
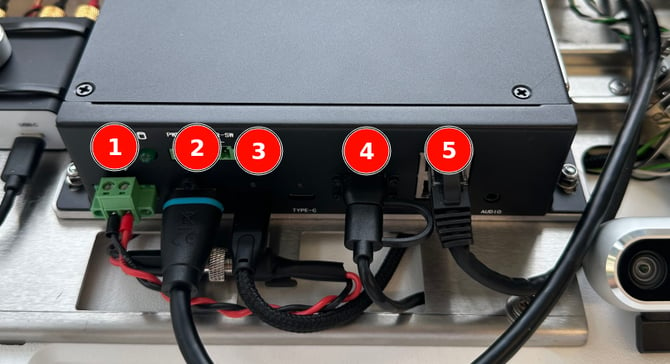
- Connect the serial adapter to the original serial cables in the following order
- PC 1 → 0
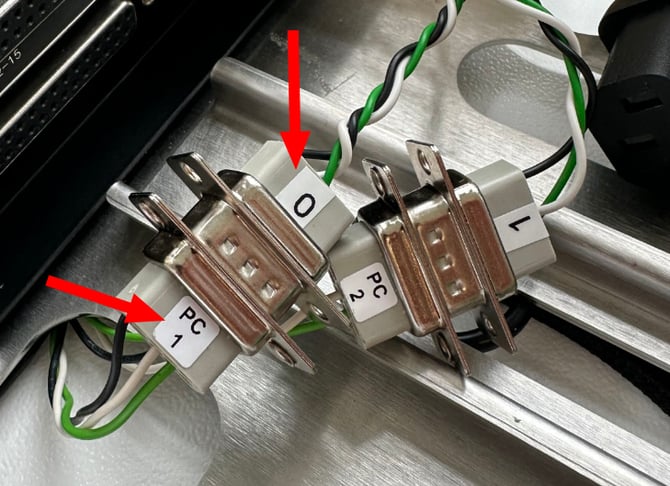
- PC 1 → 0
-
- PC 2 → 1
- PC 3 → 2 (only Pro systems)
- PC 4 → 3 (only Pro systems)
- Secure the cables with e.g. cable ties
- Plug the power cord back into the power supply
Contact the LYMB.iO Service Team
- Inform our Service Team, so that we can finish the configuration. To do so, please create a ticket