Hardware Setup
Overview
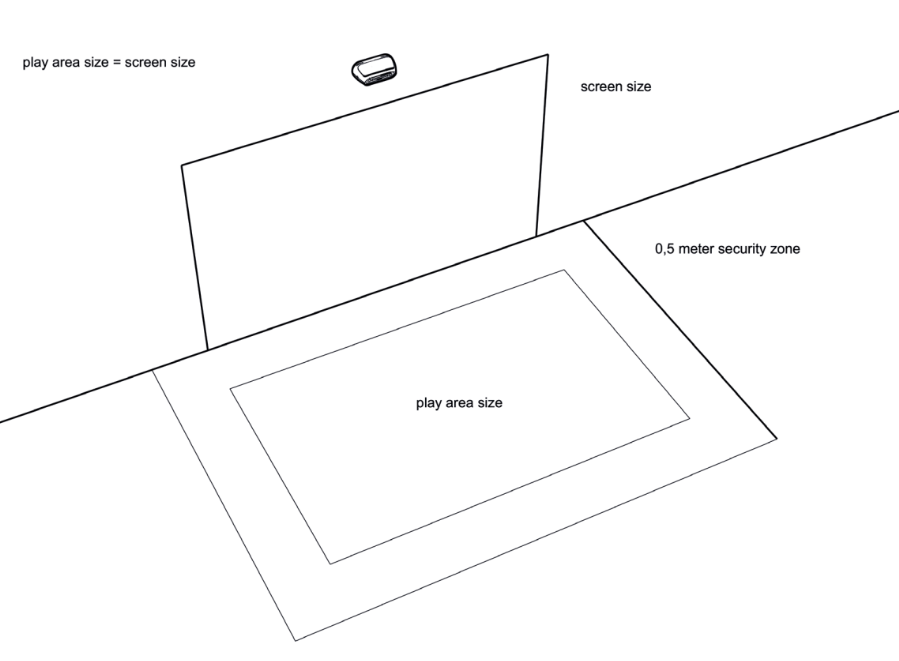
The play area is the same size as your screen. We recommend a security distance of 0.5 m around your play area. The area should be free of any stumbling hazards.
Console Positioning and Projection
The system has measurements of 18.5 x 34.5 x 19.0 cm (LxWxH).
It needs a minimum free space to the ceiling of 5 cm and a minimum distance to the projection of around 45 cm (a bit more is fine, but less is problematic).
The console has to be centered and leveled above the screen. The absolute maximum screen size is 320 x 200 cm (WxH). We also recommend at least a 30 cm distance from the projection to the floor, the bigger the distance the better the ball detection.
Max. Screen Size = (Room Height - 45 cm Screen Distance - 19 cm Console Height - 5 cm Ceiling Distance - 30 cm Floor Distance) or 200 cm, whatever is smaller.
Important! Mount the console on a straight and rigid wall and make sure the device is flush with the wall, do not mount it on any kind of spacer to the wall! Avoid, for example, stretching any fabric in front of the wall.

Prepare the play area
Ensure that the wall where the console gets mounted is completely free of any moveable objects. Also, nearby windows or moving doors are bad for the quality of the detection mechanism.
We recommend covering the area in front of your wall with a non-reflective dark material, like a carpet, especially if you have a reflective wooden or tiled floor. Make sure that carpet is not moving.
Mount the Console
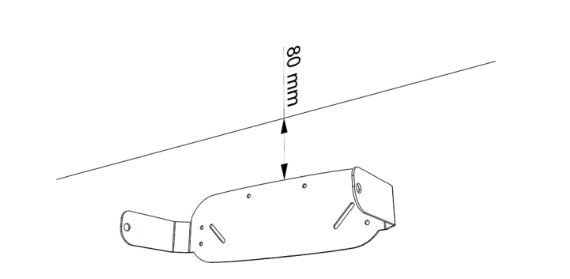
Step 1 | Place the wall mount not closer than 80 mm from the ceiling.
Step 2
Mark the diagonal slots on the wall and drill holes for the dowels (6 x 30) roughly in the middle. Temporarily screw (4,5 x 40 mm) the mount to the wall (loosely) and use a spirit level to make sure it is leveled. Mark the holes for two to four additional holes, drill, place the dowels, and screw everything tight. 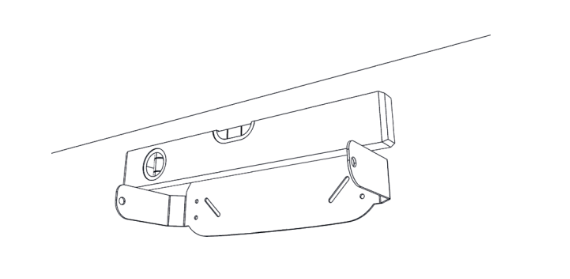
Step 3
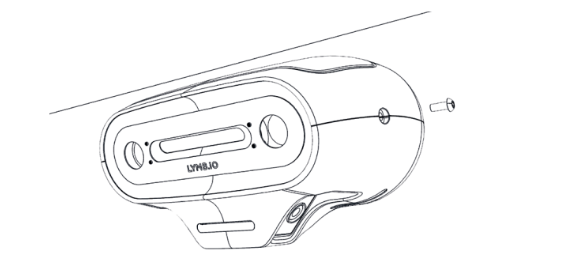
Connect the power, HDMI, and Ethernet (optional: WiFi stick) and fix the LYMB ONE to the wall mount with the two screws supplied.
Projector Positioning and Settings
Mount your projector as close and high as possible to the ceiling in order to minimize the shadows created by the players (to get the best playing experience). Use the projector setting „corner correction“ to make the screen borders straight.
Make also sure to set up the Projector in a way, that circles are not distorted and the full projection can be seen. Setting back the projector to defaults may help.
Cabling
Ensure that the HDMI cable from the projector to the console isn't hanging loosely within the detection zone; our suggestion is to utilize cable channels to keep it organized and out of the way. The same goes for the LAN cable.
Software Setup
Registration
When powering your console for the first time you will see a registration screen like the following.

Either scan the QR code or go manually to https://lymb-admin.net/SystemRegistration, register a new Account there, and add your system to your account by typing in the Registration Key shown on the screen.
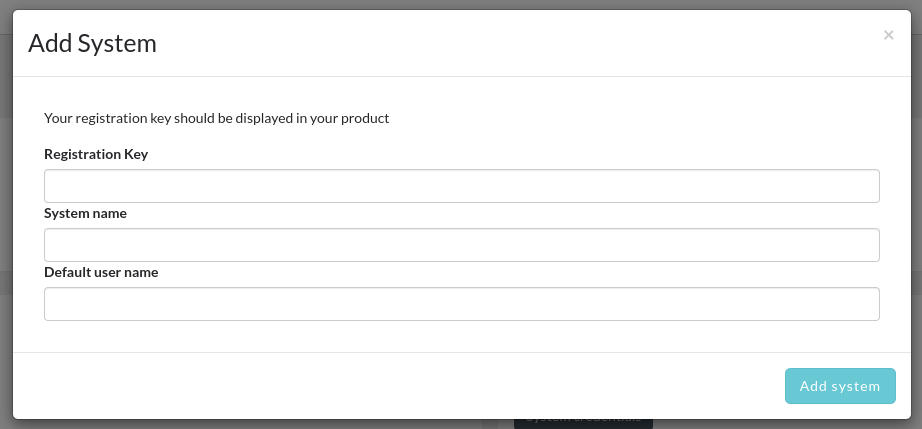
- Registration Key: The key that is shown on your screen
- System Name: The Name that you want to be shown online and in our App
- Default user name: The Name that you want to use for the default user (most probably you), that's also the name that will get greeted by default ("Welcome, Max")
Update
After the first start, it might be that a firmware update is initiated. It is essential to let the system run in that case, even if it may take some hours to complete.
Calibration
It is also necessary to calibrate the sensors, the calibration game appears automatically, therefore. Just follow the instructions on the screen. You can start it anytime again by launching the game Calibration.
Settings
On the left, navigate to your system by clicking on Systems and Edit. There you can set up your system settings.
Dimensions of your projection
The most important settings are Screen Height, Screen Width, and Distance Sensor to Screen, measure those physical values on the wall and enter them in the dialogue. The distance should be measured between the top edge of the projection and the bottom edge of the LYMB One.
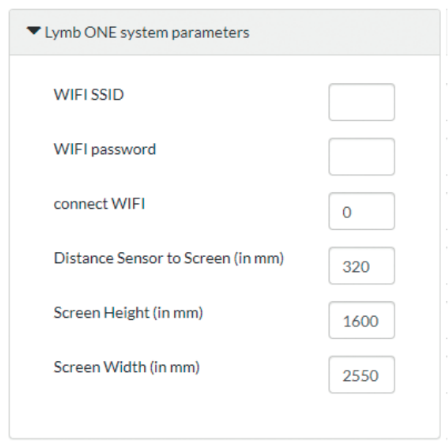
WiFi
The WiFi functionality is in beta phase, we recommend using a cable for stability.
If you want to use the WiFi stick, then input your WIFI name and password. „Connect Wifi“ should be set to 1 after SSID and password are entered to connect. Setting it to 0 disables the connection again permanently.
While running the initial updates it is advisable to keep the console connected via cable since cable connections are in general more robust. Also, keep in mind to to keep the console connected via cable while setting up the WiFi for the first time, otherwise the WiFi settings won't get transferred to your console.
App
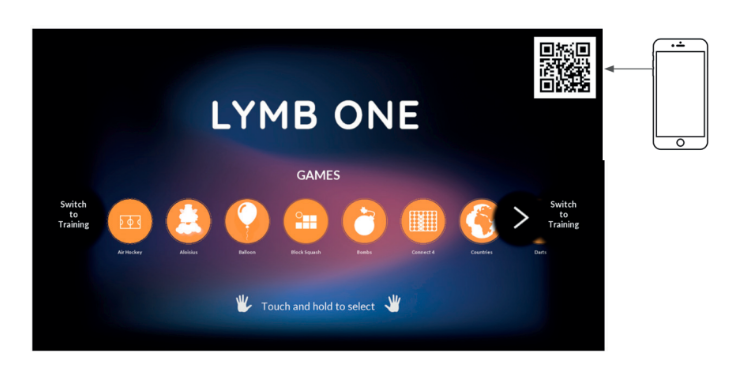
Download the LYMB.iO app to your Android or iOS phone and scan the QR code shown in the upper right corner.
| Android | Apple |
 |
 |
Usage
Ball
We recommend a uni-color softball, like the ones you can find in our store here.
Game Control
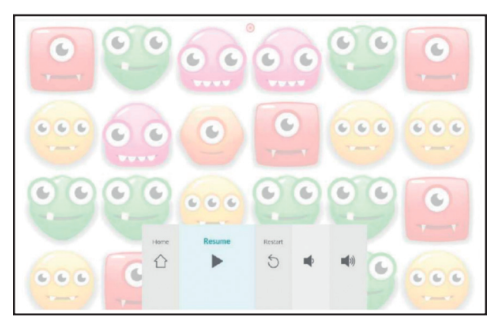
You can control the menu by either touching and holding a game icon with a ball or by selecting the game in your app.
You can open the In-Game menu by touching and holding the wall while playing a game.
Turn off the system in the settings game. Disconnect the power adapter from the power supply after the screen gets black.

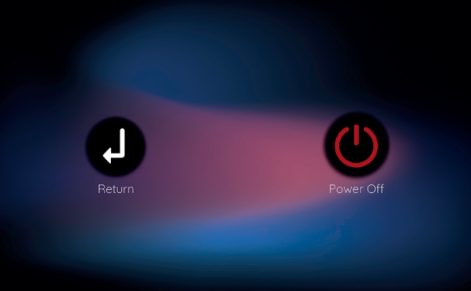
To turn it on again, reconnect the power supply unit to the main. It starts automatically.