
Updating the controller firmware on iSQ systems gives you access to the latest sensor-related features, performance improvements, and system enhancements. This guide explains each step of the update process so you can understand what is required and complete the firmware update safely and correctly.
Step 1: What you need
To prepare for the update you will need:
- Laptop
- Terminal emulator software - e.g. Tera Term
- USB-to-Serial(female) RS232 cable or USB-to-Serial(male) + female-to-female RS232 null modem serial cables. For example: this USB-to-Serial cable + this RS232 extension cable
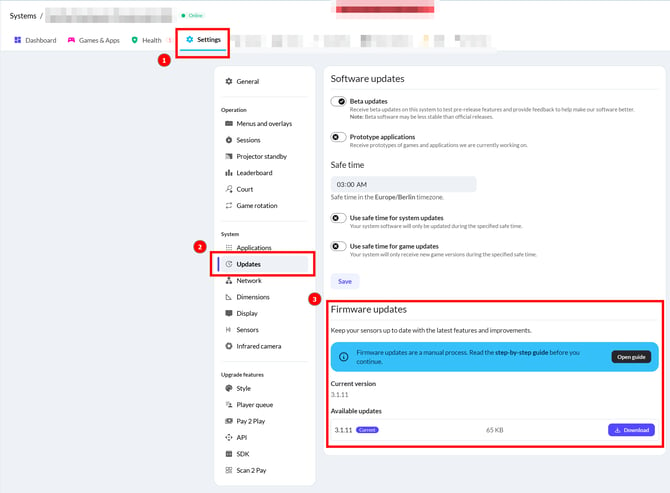
- Firmware binary file - you can download it from your Court Admin page in Systems (Choose your system) -> Settings -> Updates -> Firmware updates
Step 2: Opening covers
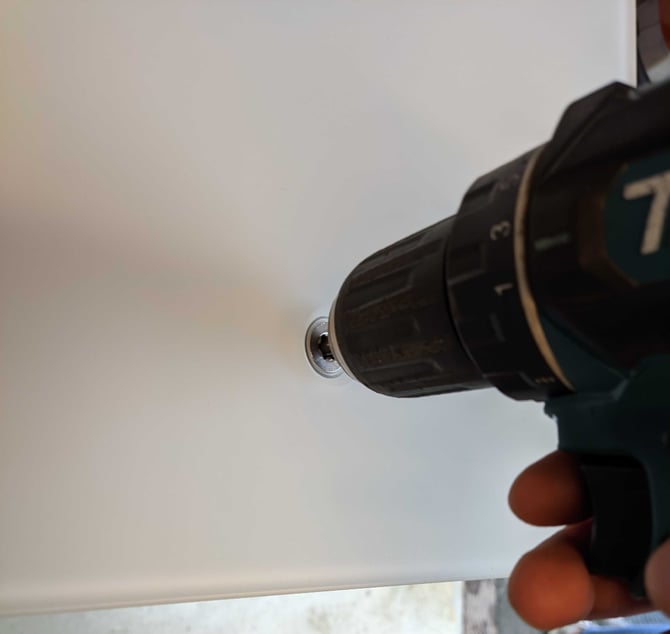
Now you need direct physical access to the controllers. To achieve this, carefully remove the system covers by loosening and taking out the screws that hold them in place.
Remove all the visible screws (8x TX45) on all four panels.
Once covers are removed you will see 8 controllers (green circuit boards).
Step 3: Updating controllers
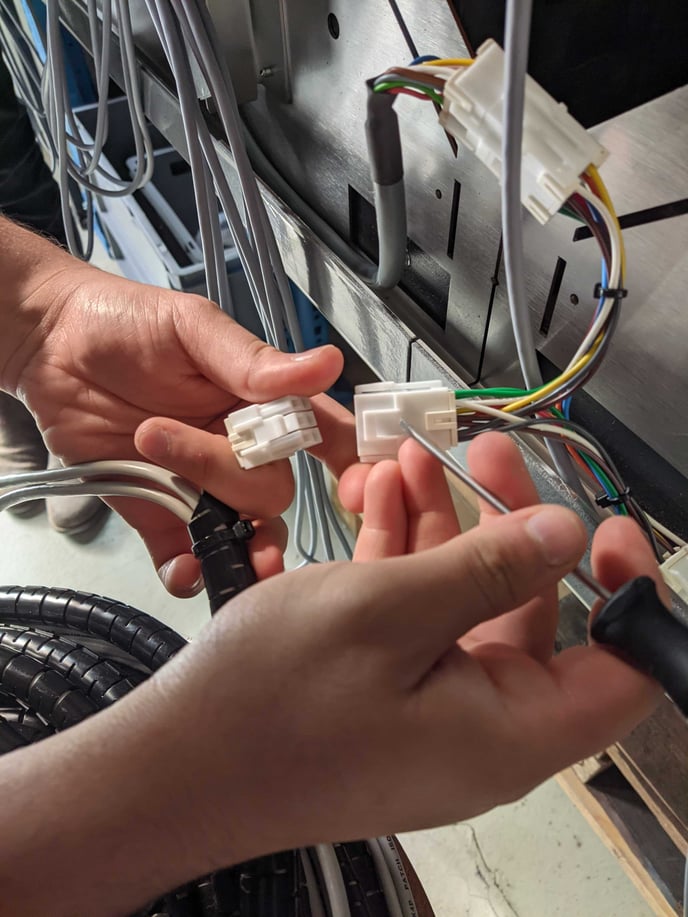
- Turn OFF all controllers by disconnecting this White connector in the middle of the system:
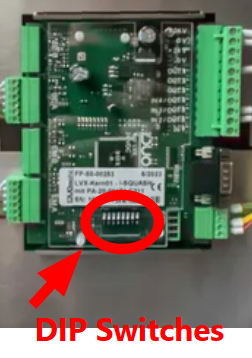
- Then go to each controller and put DIP 1 to the ON position (up). Do NOT alter positions of other DIP switches!
- Turn ON all controllers by reconnecting the White connector
- For each controller one-by-one:
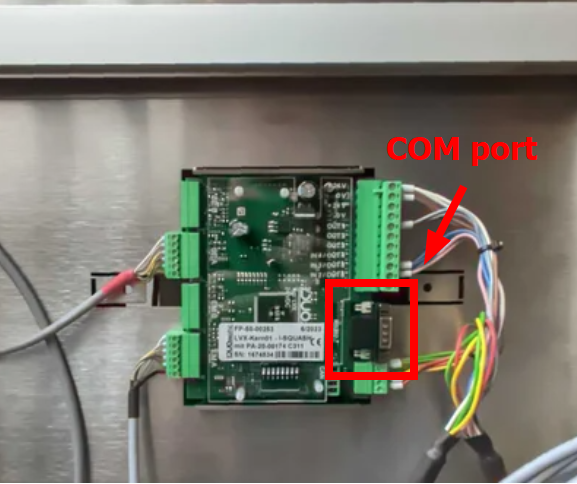
- Connect the USB-to-Serial cable so that the USB plug goes into your laptop and the serial plug is attached to the controller’s COM port on its right side. This connection allows your laptop to communicate directly with the controller for the firmware update
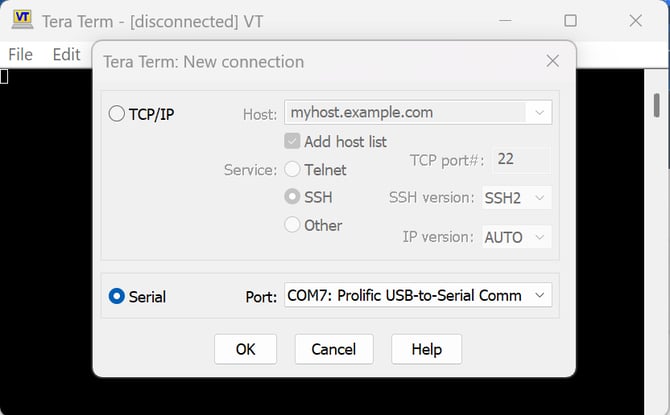
- Open your terminal emulator on the laptop and connect it to the USB port that is linked to the controller. In this guide, we use Tera Term as an example, but your own terminal program may offer similar options with slightly different names or menu paths to achieve the same result
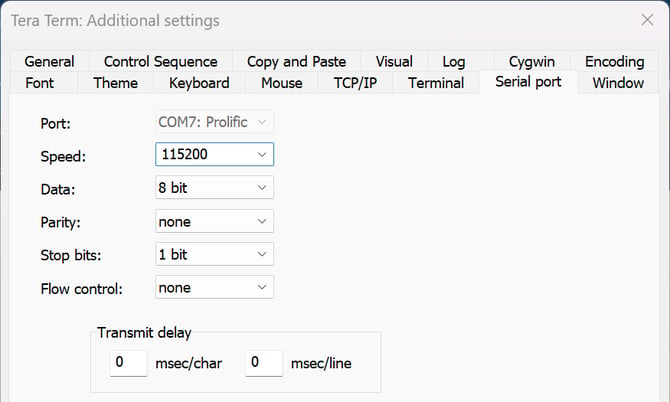
- Set these settings for your serial communication:
- Baud Rate/Speed = 115200
- Data bits = 8
- Parity = none
- Stop bits = 1
- Flow control = none
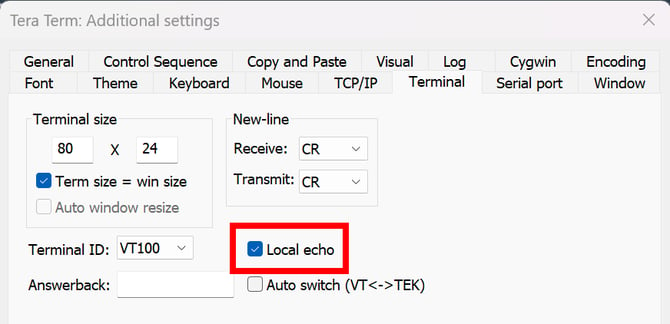
- You can also turn on local echo, so you will be able to see what you type in the terminal later:
- Now terminal communication is setup. Go to the terminal window and and type "!" followed by pressing [ENTER]. You should see something like this:
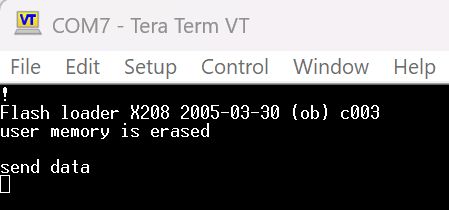
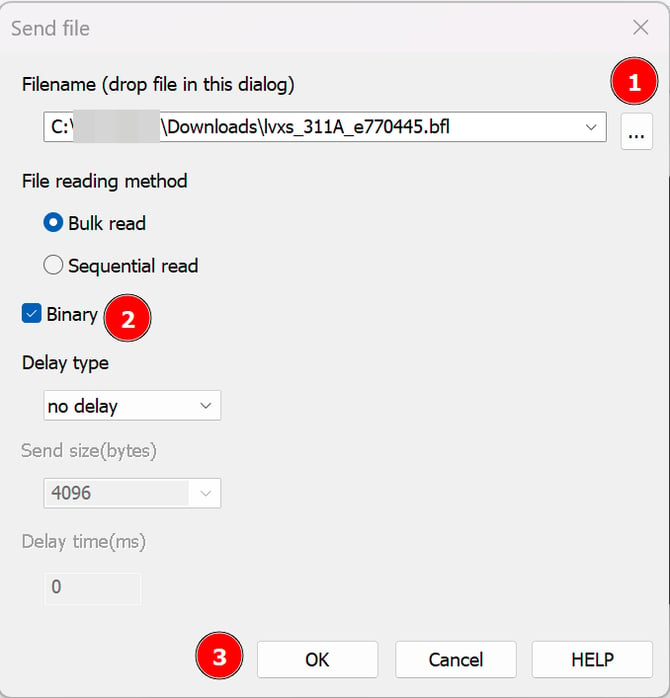
If you see phrase "enter "!<cr>" to erase flash", just enter "!" and [ENTER] again - Now you need to send the binary file you downloaded from Court Admin. In Tera Term you go File -> Send file. Browse the binary file, tick the "binary file" checkbox, and press "OK"
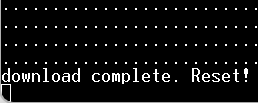
- You will see file being written in terminal. It should take a couple of seconds to finish. At the end you should see something like this:
- You can move onto the next controller and repeat steps a-f on all of them
- Connect the USB-to-Serial cable so that the USB plug goes into your laptop and the serial plug is attached to the controller’s COM port on its right side. This connection allows your laptop to communicate directly with the controller for the firmware update
- Once firmware binary has been uploaded to all controllers, disconnect the White connector in the middle to turn them all OFF
- Turn the DIP 1 switch back OFF (down) on all controllers
- Reconnect the white connector to turn ON all controllers
- Check the middle LEDs of all controllers, they should display signals like these:
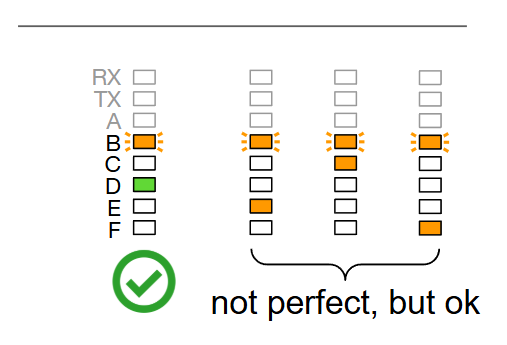
There should be no red LEDs turned on here. If you see other signals, please perform Sensor Calibration
Congratulations, you have successfully updated firmware of your controllers! Below you can find new features that come with each new firmware:
Features of new firmware
-
3.1.11
- With the new firmware installed, now you will have access to the new section in your system's admin page at Settings -> Sensors -> Sensor calibration. There you have a new "Start calibration" button that performs sensor calibration automatically.
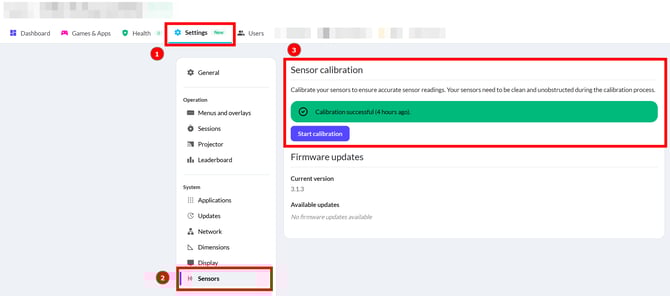
- With the new firmware installed, now you will have access to the new section in your system's admin page at Settings -> Sensors -> Sensor calibration. There you have a new "Start calibration" button that performs sensor calibration automatically.
Warning! This calibration button shouldn't be used too frequently. It has a potentially finite number of allowed calibrations before hardware may start to perform unpredictably. We recommend to use it only in case of sensor blockages (after cleaning them) and in case of drastic changes in the environment where the system is installed (e.g. once every 3-6 months to adapt to temperature and lighting changes)
-
- Additionally, new firmware brings better automatic calibrations that happen in the background, so your system will become more robust to sensor related issues. You can read more