
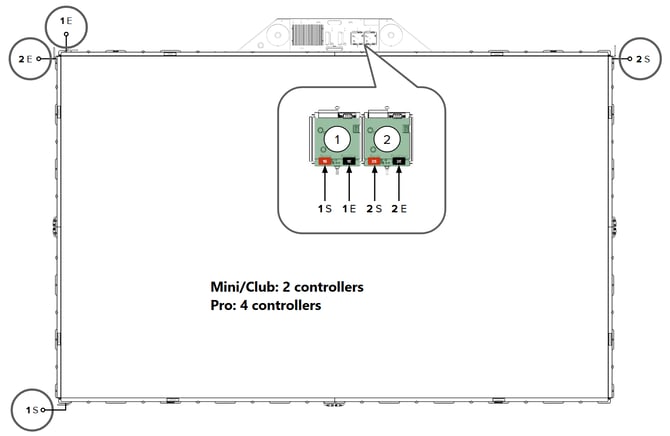
MultiBall systems use controllers to properly process the input coming from sensor bars. Controllers are green circuit boards that can be found under the top tin of the system:
Sometimes controllers might become disconnected from the system. In this case system will detect it and display a warning in the Sensor Inspector screen:
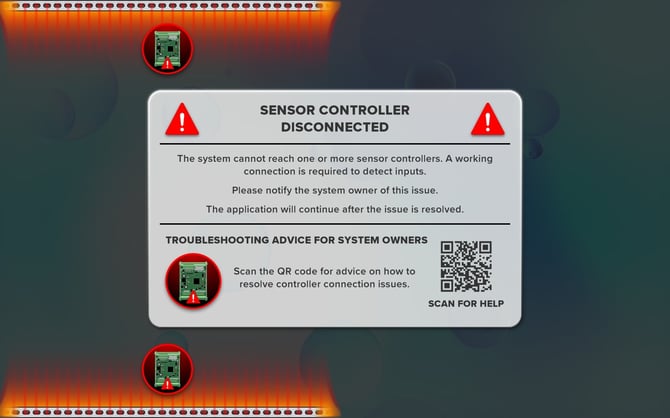
This guide explains how to troubleshoot disconnected controllers.
Step 1: Inactivity check
If the system doesn't receive any input through a controller from sensor bars for too long ( ≈ 2 hours), while still receiving input from all other controllers, it assumes that the inactive controller is disconnected. In this case if you see the Sensor Inspector warning, it might be enough to simply trigger the inactive region by throwing a ball or touching a wall there. If inactive controller reacts to this, system will see it and unblock the screen.
Step 2: Power check
If inactivity check did not resolve the issue, controllers need to be physically inspected. To do this, the top tin needs to be removed. Here is how:
What you need
- A ladder (not a straight one, it should stand by itself to keep the detection area of the wall unobstructed)
- A TX30 Torx screwdriver (for the console cover)
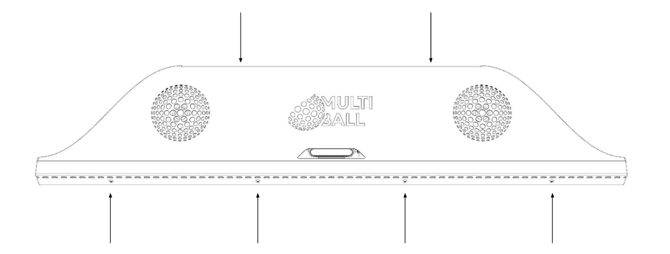
- Remove the screws (M6, TX30 Torx) of the console. Depending on the generation, it will be two to six screws.
- Pull at the lower end of the cover to detach it from the rest of the frame. The upper end is secured by a tab. Lift the cover upward to remove it.
Once the top lid is removed, you will see the controllers on the right side of the console (2 controllers for Mini/Club systems, 4 for Pro). Below each controller you will see metallic power switches:
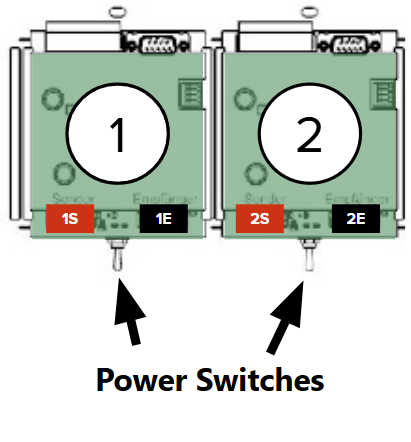
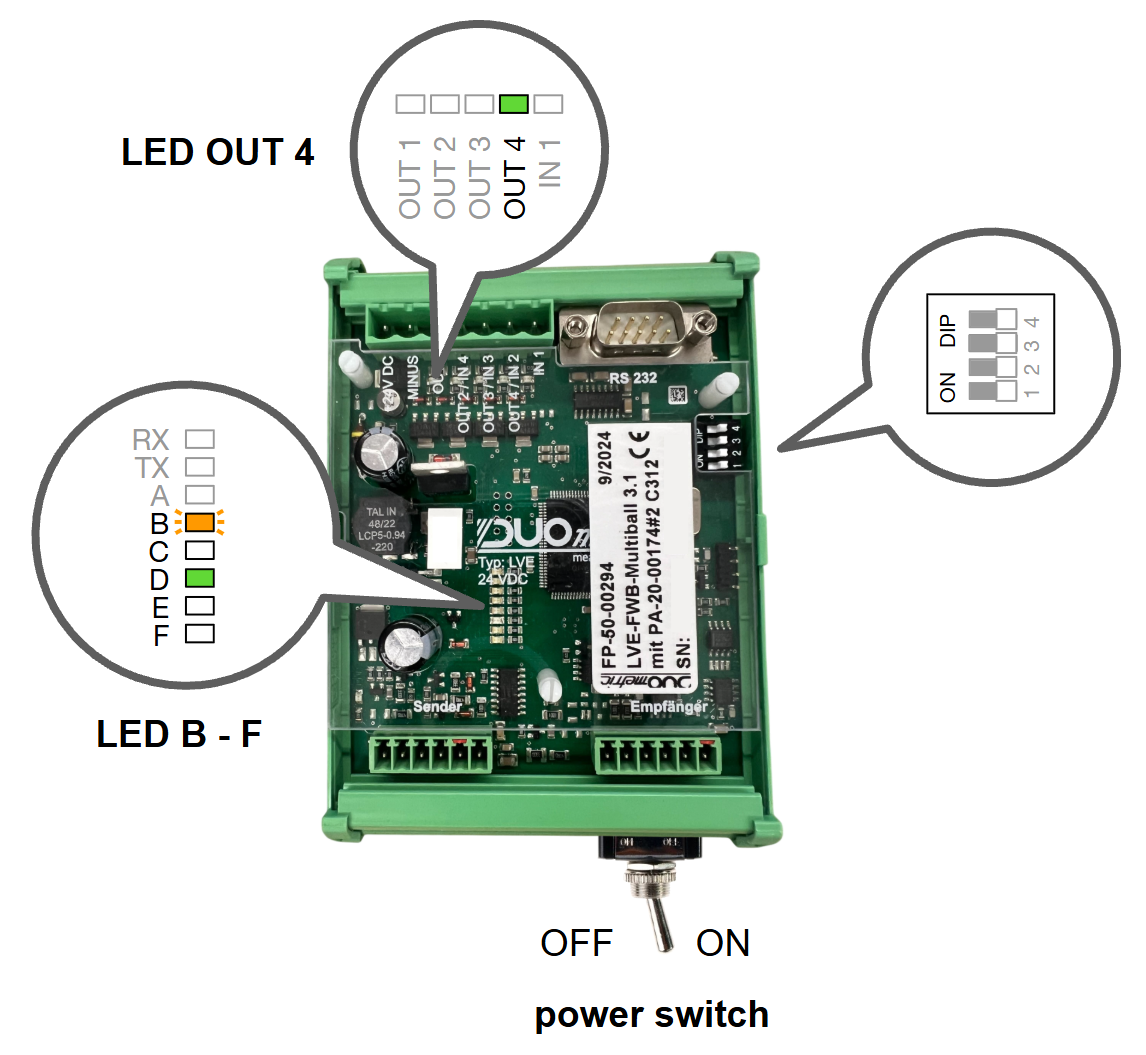
Make sure they are in the ON position. You can tell if controller is powered on by its LED signals: LED OUT 4/IN 2 at the top of the controller should be constant green, some of LEDs in the middle may also be lit up.
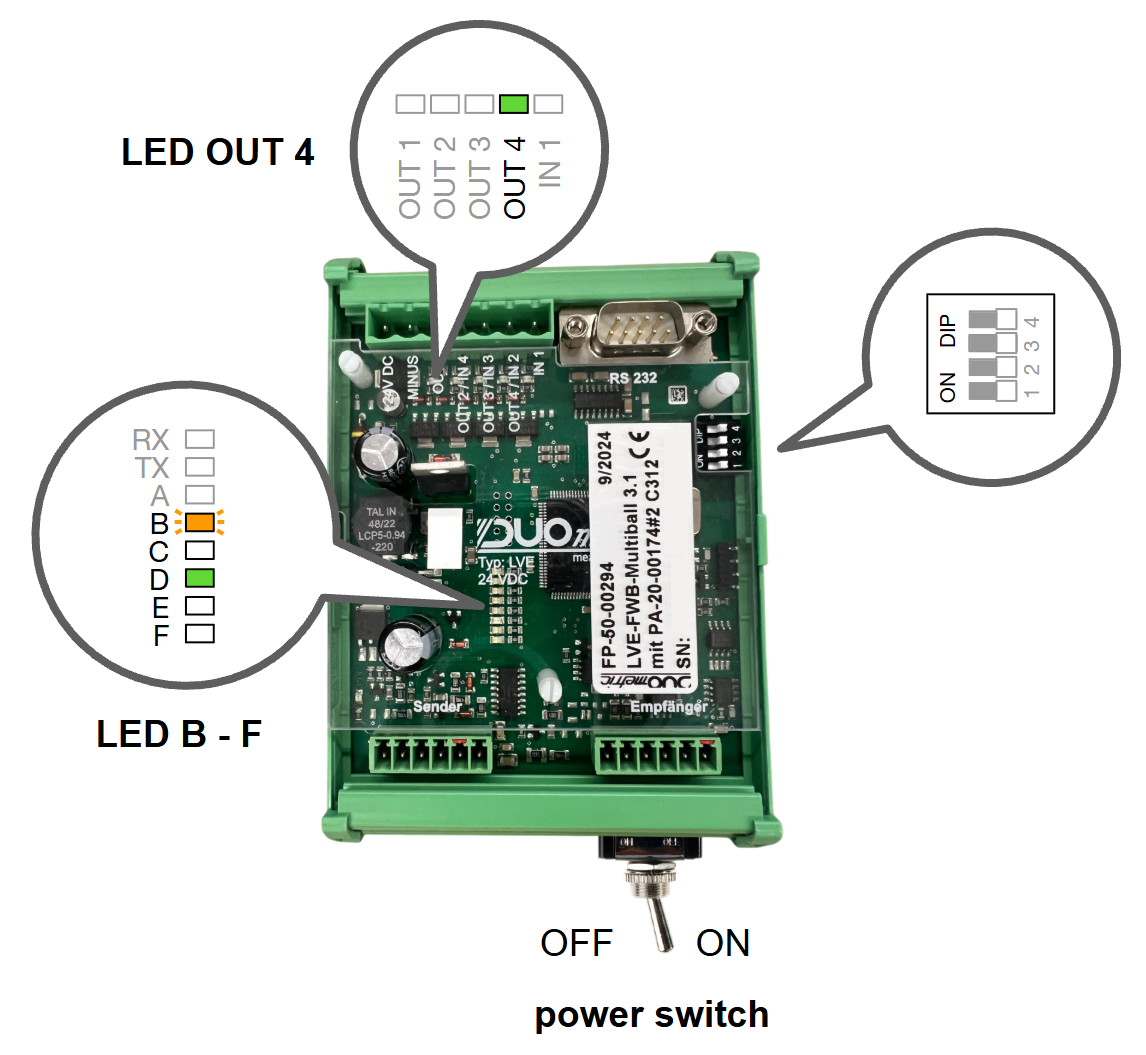
If the problematic controller was not turned on, please turn it on. System should detect its activation and unblock the screen.
If turning the switch did not turn on the controller, please make sure that the Big Green connector in top left of the controller is properly inserted:
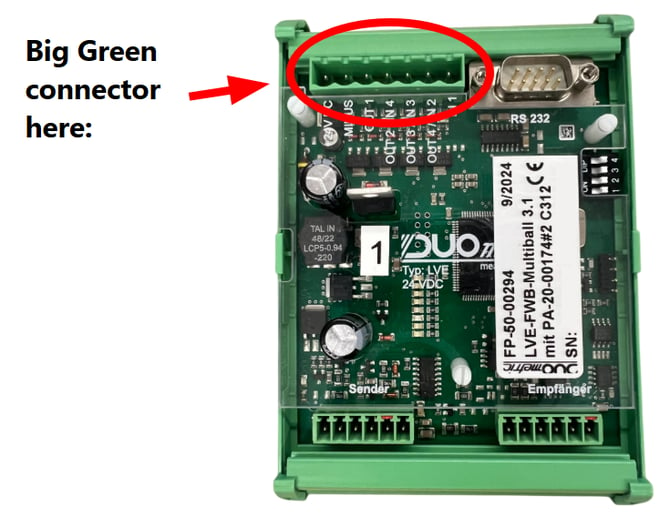
Step 3: COM Cables Check
If power check did not resolve the issue, COM ports need to be checked for proper connection on both controller and PC side. COM port can be found in the top right part of a controller:
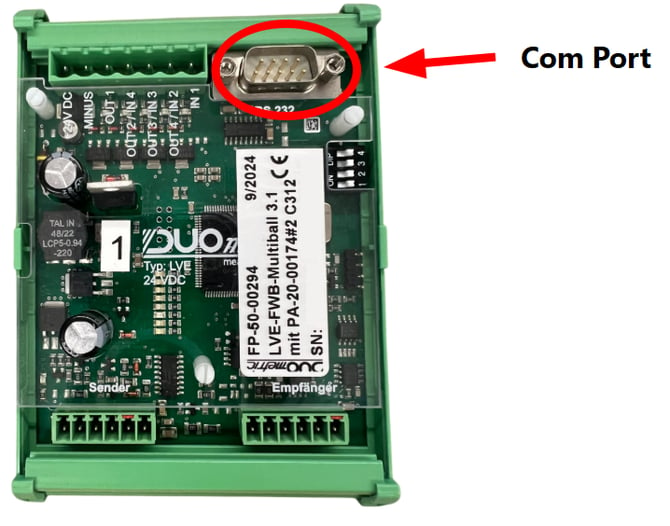
And on the right side of the PC:
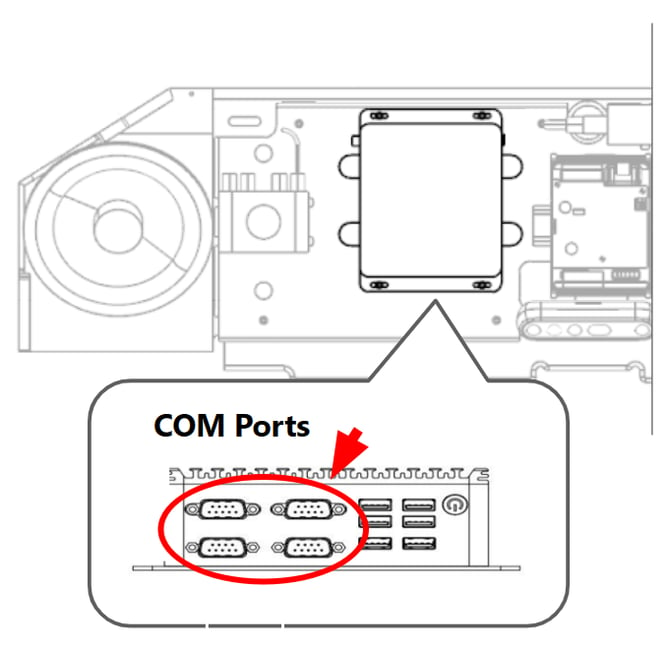
Please check that COM cables are properly inserted into the ports and, ideally, screwed in for extra stability. Then throw a ball or touch the affected region on the wall to send input to sensors. If connection was fixed, system will receive the input and unblock the screen.
Step 4: Sensor Cables
If COM cables check did not resolve the issue, sensor cables need to be inspected. Sensor cables are connected at the bottom of the controllers. Each controller has 2 connections: Red Sender S and Black Empfänger E (Receiver)
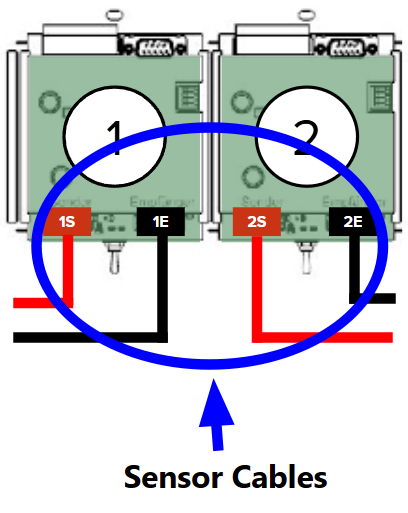
Controller 1 should be connected to cables 1S and 1E, controller 2 to 2S and 2E, and so on.
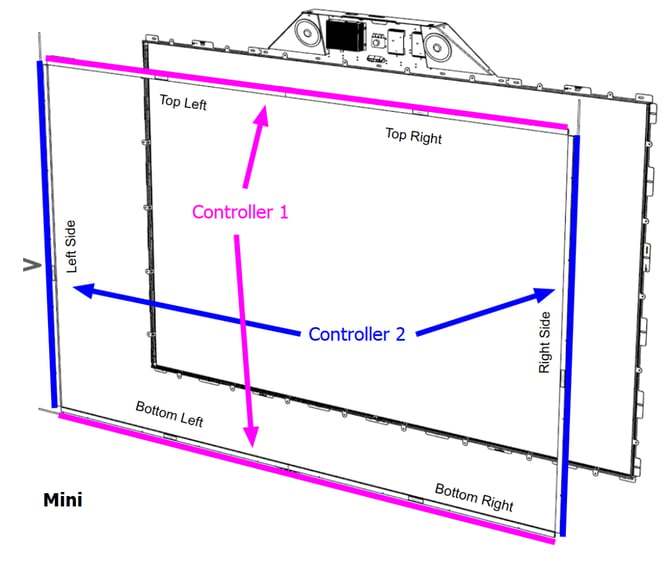
Mini/Club systems:
- Controller 1 is connected to all top and bottom sensors
- Controller 2 is connected to all left and right sensors
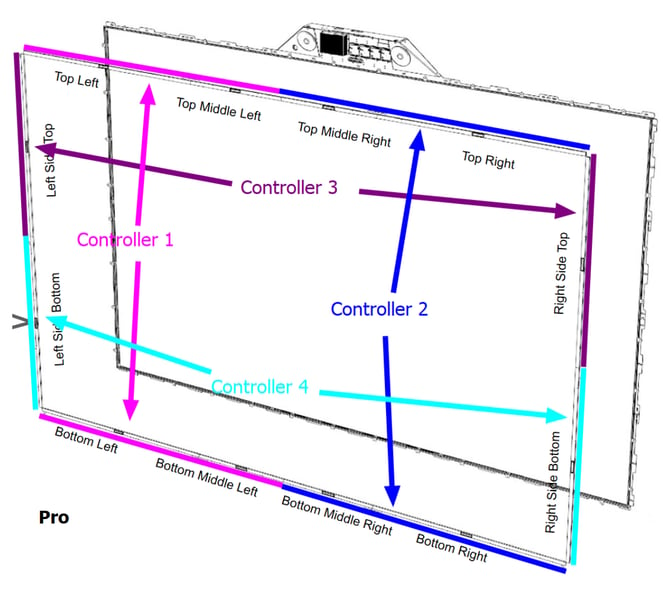
Pro systems:
- Controller 1 is connected to all sensors on the left half at top and bottom
- Controller 2 is connected to all sensors on the right half at top and bottom
- Controller 3 is connected to all sensors on the top half on the left and right
- Controller 4 is connected to all sensors on the bottom half on the left and right
On some Pro systems controller-sensor configuration for controllers 2 and 3 may be swapped (i.e. controller 2 is connected to all sensors on the top half on the left and right, and 3 is connected to all sensors on the right half at top and bottom)
You can check the respective controller reacting to sensor input by blocking the sensor (touching the wall) and observing the LED OUT 1 in top left light up and one of LEDs in the C-F range in the middle turn off. A healthy controller with both sensors correctly connected should show following signals:
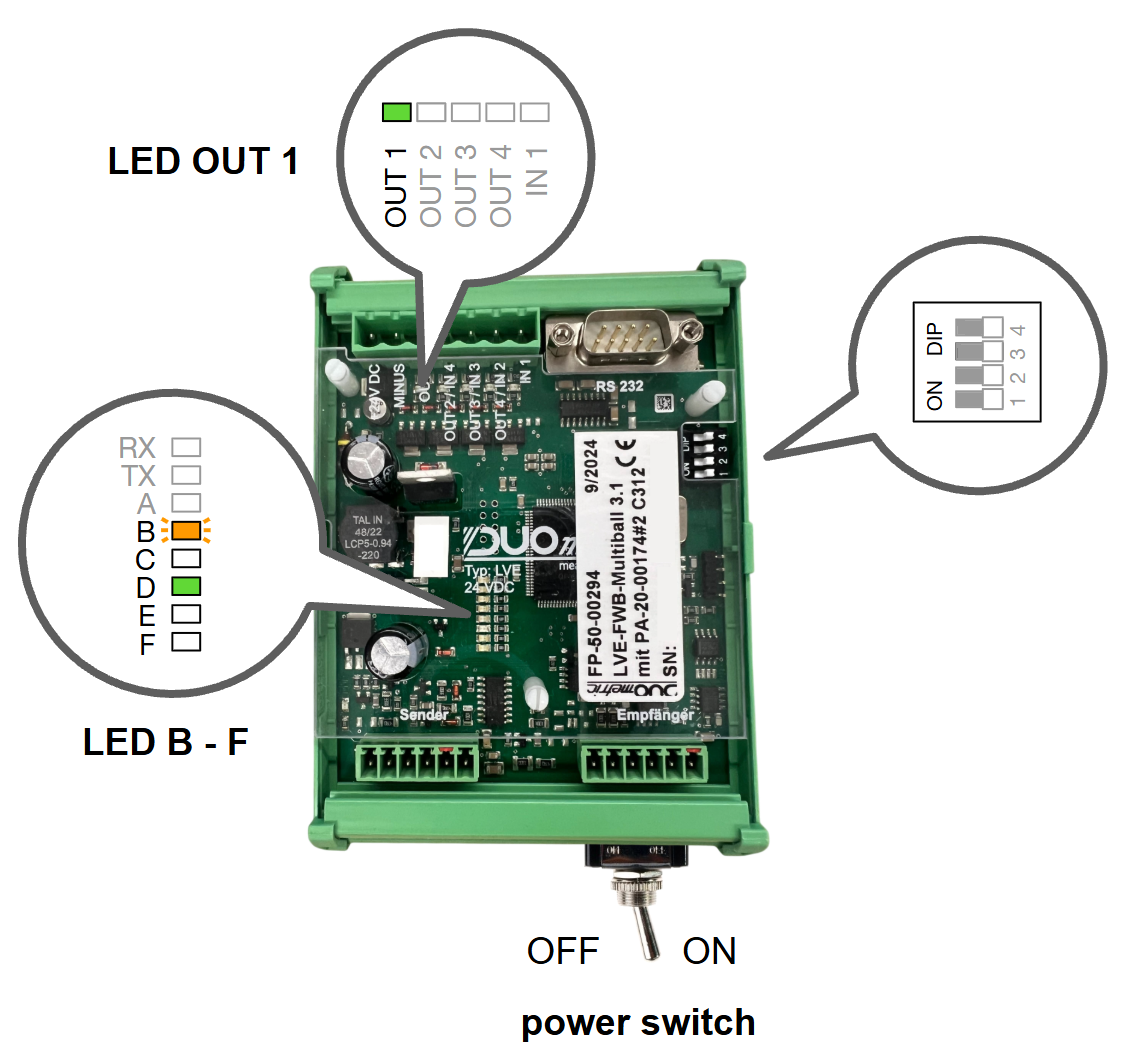
The LEDs C-F may be slightly different, but still suitable:
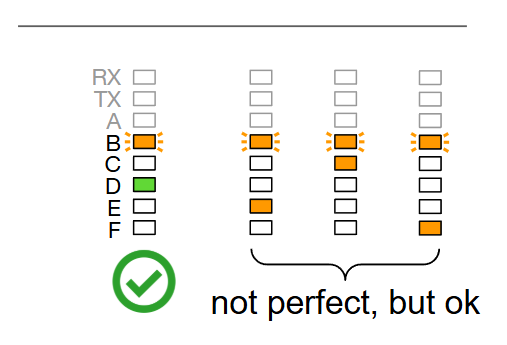
You can learn more about LED signals in this guide: Sensor bar alignment
If controller-sensor configuration was wrong, make sure to reconnect everything correctly and calibrate the sensors: MultiBall - Sensor Calibration
Step 5: DIP switches check
If sensor cable check did not resolve the issue, last thing to check is DIP switches in the top right of the controllers. They should all be turned to the OFF position (to the right):
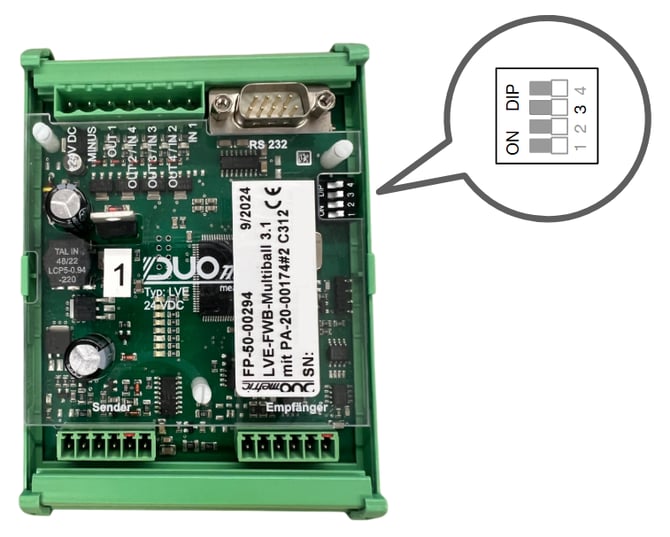
If they were not all OFF - turn OFF the controller with the power switch at the bottom, turn all DIP switches OFF, turn ON the controller and see if that solved the issue.
Further Support
If none of the steps above helped to fix disconnected controller, feel free to reach out to us for support: How to get Support?